Beads are decorative pieces of different sizes and shapes. They are used to adorn the neck adding a classic touch to the overall look of a person. In ancient history, seeds from fruits, woods, animal claws, and cowries were used as beads. In the era of civilization, sophisticated materials like plastics, silicone have been adopted.

What’s more, people now personalize their beads by hand making it themselves. So, what do people want in making beads? For one sparkling bead gives a sleek and classy look. DIY makes you determine the color, size and create a unique collection of beads peculiar to you. Now, do you want to DIY? It’s not hard, with simple silicone mold and coloring, you can craft glittering beads of any shape and size.
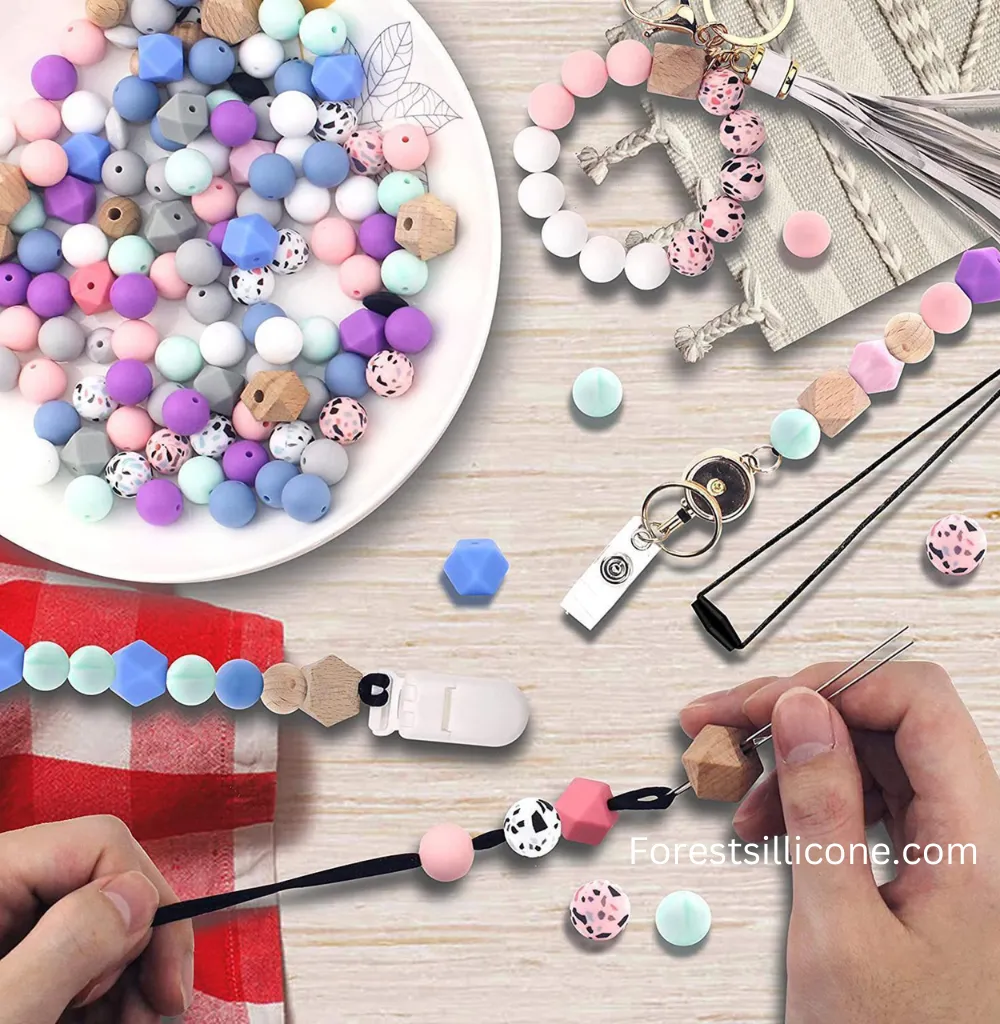
This article will teach you everything you need to know about how to make silicone beads for jewelry making, chains and more using silicone grade materials.
What are Silicone Beads?
The short answer is, it is a type of bead made with silicone. Silicone on the other hand is a rubber-like substance that is very elastic in nature. Unlike rubber, silicone is man-made and safer than rubber. It was first used for breast implants. As a result of its success in implants, it has become ubiquitous across all industries. One such industry is the fashion and beauty industry.
In the fashion industry, beads are adornments that are used to enhance the overall appearance of our dresses. They are decorative pieces used as necklaces, bracelets, hair gears etc. As discussed earlier, they are peripherals added to complement the style of our dresses.
Journeying through history, beads are made using natural materials like bones, nuts, seeds, and woods etc. As technology improved, advanced techniques and materials were adopted to craft beads. Examples of the advanced materials include glass, crystals, plastics, ceramics and silicones etc.
Silicone has a lot of characteristics that present them as the go-to material of choice. For example, in the aerospace industry, silicone is used for gaskets because they are strong, heat resistant and very flexible.
However, in the fashion industry, these characteristics are secondary when deciding on the best material for crafting beads. Here, silicone is preferred because it is non-toxic, high quality, soft and squishy to the touch.
Do you want to try out and experience the squishy feel of silicone beads? Well, you can be in possession by buying a readymade or if you love experimenting you can DIY.
DIY projects come with a sense of accomplishment that cannot be experienced when you buy everything pre-made. Making and crafting things from scratch unleash the creativity locked up in you. In addition, you have control and independence over the whole process.
As you know, the DIY project we are considering is the crafting of your silicone beads. Crafting your silicone beads, yourself lets you decide the shape, color, size and pattern of your beads.
If you’re ready to craft your own beads, this article will guide you on how to make a template, a mold, add color and cure your mold to give your home-made silicone beads. That being said, this is not a one-way procedure, you can modify the process to make any shape and type of beads. Let’s get started.
Step-by-step Guide to make your Silicone beads
Making Template for your Beads
Maps are drawings that direct us to an unknown destination. Astrologers with a tiny map venture into an unknown world in a quest for ancient treasures and monuments.
In like manner, before you start mixing, drying, and curing. You need to design a template for your silicone beads. You can do this with a freehand drawing but to spread up the process you can use a bead stencil.
What’s more, after you have your template, you will measure the size of the bead you want. Then, measure it out with a piece of string, wool or ribbon.
For good measure, the length should double the height of the desired bead so that your template can be cut out later.
With the string, cut out two shapes from your paper. The template should be drawn to picture the image of the desired shape. For accuracy, one side of the template does not need to match the other side to form an entire bead. Also, make sure that each half of the template is symmetrical before you pin it down onto a paraffin paper or baking paper with a tape.
In addition, use an object like a coin or cookie cutter to trace around one side of the shape and then turn it over and trace round the other side before you cut the template out with a scissors or a sharp knife.
Mold for Silicone Beads
Silicone beads are made by pouring liquid silicone into a mold. This mold can be as simple as a metal sheet inserted in a tray, plastic wrap, aluminum foil, or something like a wood carved out according to a template.
To boot, silicone molds are best when they are flat and wide to when they are in any other shape. This makes it easier to remove the silicone once it is cured.
You can buy a readymade mold for your silicone or create a mold following the template you have drawn. To know more about creating a silicone mold. You can read more on guides illustrating the whole process.
Choosing a silicone
You should opt for a food grade silicone, especially if you intend to make teething beads or jewelry that might come into contact with your skin. It’s advisable to use food grade silicone because they have been tested by the U.S. FDA to be non-toxic and body safe.
Over the years, it is known for its durability, flexibility, and non-toxic nature. Silicone is an ideal choice for creating beads that will be used by infants and children. On top of everything, silicone is easy to clean and has the ability to withstand high temperatures.
Adding Color
Now to the beauty part of your silicone bead. You should mix the liquid silicone with color pigment before you pour into the mold. So far mica powder and alcohol inks are quite good choices to achieve various shimmering solid tones.
Also, to make bright and colorful silicone beads, manufacturers use specially produced colorants with silicone materials. The colorants used will be compatible with the silicone materials. Over and above that, it must meet safety standards and be non-toxic.
To create a uniform color, the colorants are mixed in a regular pattern with the silicone during production. Due to the strict industry rules and regulations, manufacturers carefully measure and mix the colorants with the silicone.
Curing your Silicone beads
It involves subjecting the silicone material to heat and pressure. This is done for less complex shapes and designs. After molding and adding of color, the material will undergo a curing process to solidify and stabilize their structure.
Curing typically involves heating the beads to a specific temperature for a particular period of time. This allows the silicone material to bond and form a stable structure. Once the set time is accomplished, your silicone bead is ready for use.
Caring for silicone beads
Do you have that special occasion coming up? Adding silicone beads to your special occasion dress like crystals add some sparkle and classic touch to the outfit. This is because they glow in the dark, becoming noticeable to people around you.
However, silicone attracts dirt, oil, and germs over time. Proper cleaning of silicone beads helps to remove buildup of dirt and bacteria, causing your silicone beads to last longer. You can clean silicone beads in different ways depending on which suits you and allocated time.
Methods of Cleaning your Silicone Beads
· Washing Machine Method
Tossing silicone beads in the washing machine saves you time and conserves your energy. This is a great method for washing your silicone jewelry, kitchen tools, scrubbier, and other small silicone pieces.
To start, you will place the silicone beads in a water bag and tie it closed. Placing silicone beads in water bags helps to keep the beads from scattering and prevent loss in the machine.
Alternatively, you can use a garment bag or a pillowcase as long as it allows water flow through it. Note that they need to be sealed up.
Set the washing machine on a gentle cycle using cold water. This is because hot water can damage silicone. Afterwards, add a small amount of mild detergent, no more than a tablespoon but liquid detergents work best.
In case the stains are tough, for example dye stains, allow the beads to soak for 30 minutes before you start the wash. Allowing the beads to soak gives the detergent enough time to break down oils and residue before vigorous washing.
Once the washing machine is done cleaning, take the beads out immediately. Do not leave them wet inside the machine to prevent mold growth. Air dry your beads thoroughly before using or storing them.
· Traditional Hand Washing Method
This method is used for silicone beads that are not suitable for the washing machine. You will hand wash by thoroughly scrubbing each piece.
First and foremost, fill a bowl or basin with cold water and put on a small spritz of dish soap, preferably, a teaspoon. After this, dip the silicone pieces completely in the soapy water and allow them to soak for 10-15 minutes to enable the soap to penetrate oil and dirt buildup.
After soaking, gently scrub each bead with a soft-bristle brush or toothbrush. Rinse each piece rigorously with cool running water. Repeat the scrubbing and rinsing process till all dirt’s are removed.
Once all the beads look clean and glistening, lay them out on a towel to dry fully before using or storing.
· Cleaning Solutions for Tough Stains
For stains that are extremely dirty, use a specialized cleaning solution to remove tough soot that washing machine and dish soap can’t tackle.
For one, a mixture of baking soda with water makes paste you can use to scrub silicone. The abrasiveness of the baking soda loosens the sticky stains. Scrub onto silicone and let sit for 5-10 minutes before rinsing.
Another safe silicone cleaning solution is white vinegar. The acetic acid in vinegar breaks down excess from oils and dirt. For application, mix equal parts of white vinegar and water and apply to silicone pieces. Allow to soak for 15-30 minutes before scrubbing and rinsing.
For extreme cases, use an oxygen bleach cleaner specially made for silicone. Prior to use, check for product instructions to verify its suitability before using.
Conclusion
Molding your beads, yourself allows you to design your silicone bead to your taste. You can see that from creating a template, raw material selection to molding, and curing, each step plays a vital role in creating your beads so that they perform well in their intended applications.
The popularity of silicone beads is on the rise and in recent years, it’s been used by lots of companies to manufacture beads. For emphasis, silicone is used in teething toys, crafting jewelries and sensory items.
When you DIY, you have more experience and unlike buying readymade, you will be able to personalize your beads adding different patterns and styles that seamlessly portray your culture in all areas.
Frequently Asked Questions (FAQS)
Generally, silicone is a flexible and elastic material. In fact, it has a striking elastic nature as rubber. Silicone beads are soft and chewable for babies.
Based on the nature of silicone, it is safe for babies. Silicone doesn’t harden, tear or peel off with time. It is also heat and bacteria resistant. This means no matter the amount of baby spit, it will not abhor bacteria. Another great property of silicone is they are free of allergens like BPA and lead.
- How long can Silicone beads last?
Silicone is very durable; with good care it can be used for over 10 years. The longevity of silicone depends on a lot of reasons such as the type of silicone used, how often it is exposed to radiation from the sun etc.